Eclipse Locally & Vim Remotely
Overview
If you don't hate IDEs, then you owe yourself a look at Eclipse. I won't get involved in the editor wars --if you don't know, don't ask. But I think Eclipse is, among other things, a feature-rich C++ platform offering features like incremental compilation, continious build, easy-to-use debugger and so on.
I've decided to use it as my local development environment next to Vim & Make that I'll be using while working on the server remotely.
Happy Hacking!
Download & Install
Eclipse Downloads are available at: http://www.eclipse.org/downloads/
It would be interesting to download the Eclipse Modeling Tools distribution, which already includes the plugins we might need for experimenting with the UML editor.
Select your operating system and platform to proceed with the download.

Install Eclipse by extracting the archive you just downloaded. GNU/Linux users can install it under /opt.
    $ cd /opt
    $ sudo tar zxvf eclipse-modeling-...-linux-gtk.tar.gz
Try to create a shortcut depending on your graphical environment for easier launch of Eclipse in the future.
Once you launch Eclipse, you'll be prompted to choose a workspace. This is where your project files are stored. Something like ~/ws/eclipse would be appropriate.
By installing new plugins we can adapt Eclipse to include new functionalities we need. Here we're going to add the required plugins for setting up a C/C++ IDE.
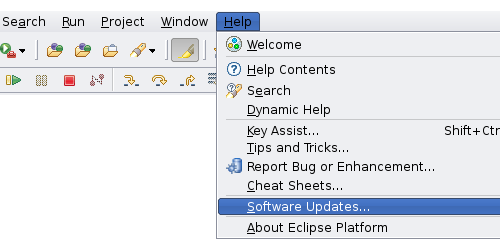
Installing CDT: the Eclipse C/C++ Subproject
Go to: Help > Software
When the wisard shows up, go to tab and then click on . Enter the following URL in the input field.
http://download.eclipse.org/tools/cdt/releases/ganymede

You have just added a new repository, which Eclipse can use to retrieve new plugins and their future updates. Now, check the button beside the newly added repository and click on .
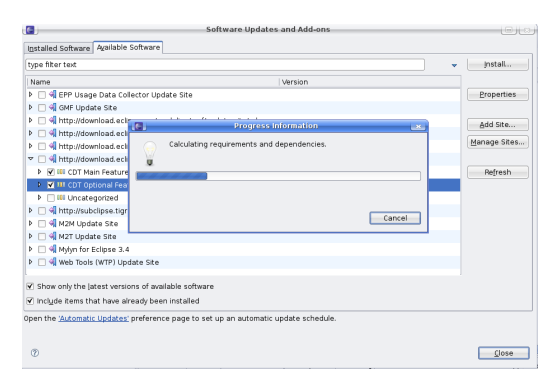
Proceed to install the selected plugins by following the steps suggested by the wisard and then finish the installation.
Usage
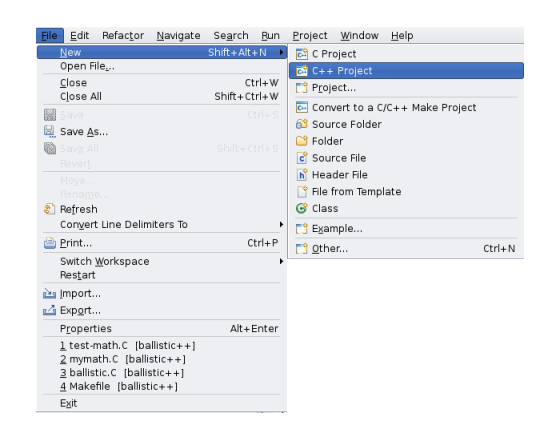
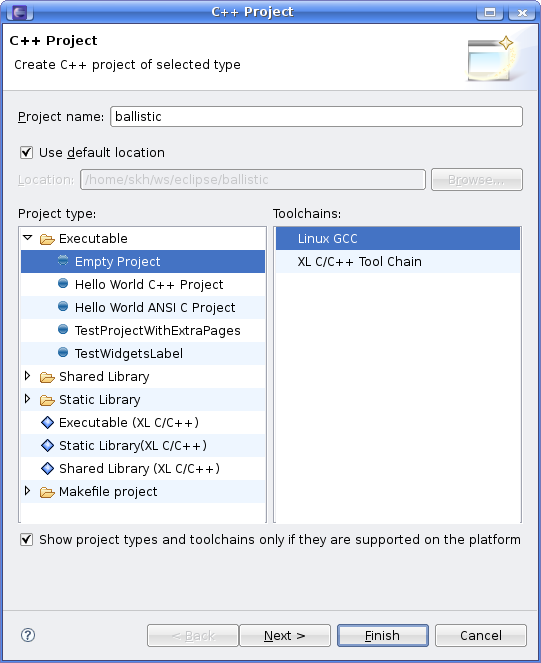
Start a new C++ project by clicking on File > New > C++ Project
When the wisard appears, make sure that you select the right environment.
Note
In case you're using a version control system, you should first check out your source code and while the focus is on the project in the file browser, click on File > New > Convert to a C/C++ Make Project.
Once the project is created, you should add your source files to the project. That is, *.h files, *.C, Makefile, etc.
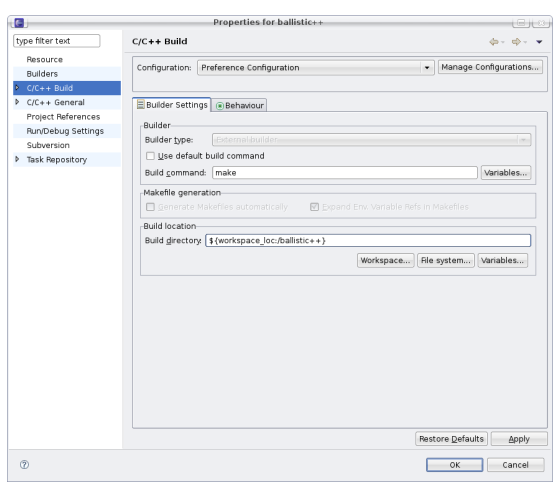
Build Your Project
CDT perfectly understands Makefiles and you should be able to build your project without any adaptations as the default targets are called. You could however right-click on your project and then on to check the build settings of your project.
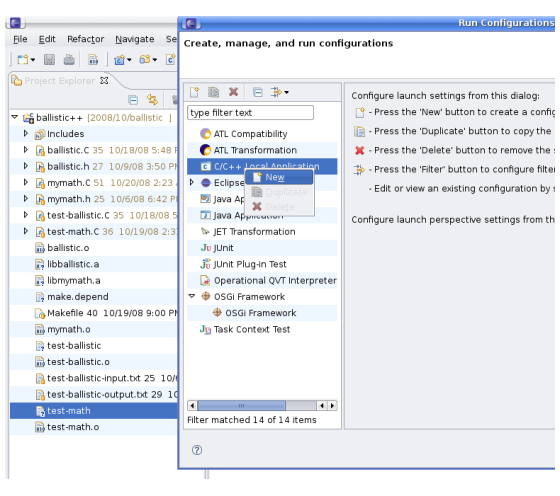
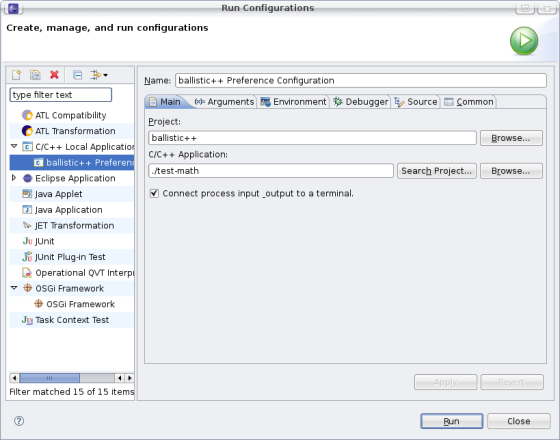
Run Your Project
In order to run an executable that has been generated by the compiler, right-click on the executable and then click on followed by .
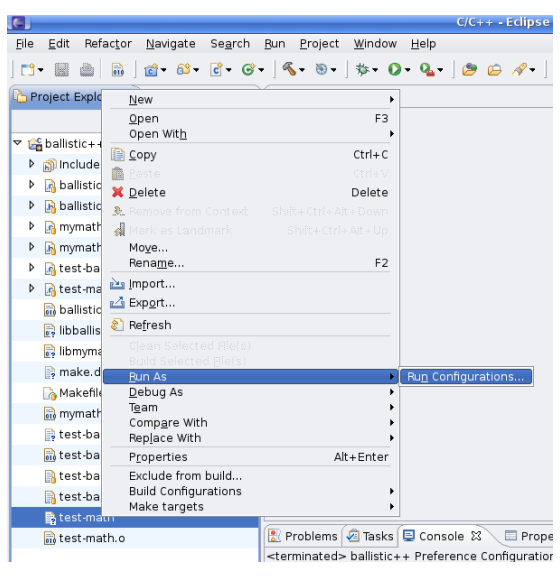
Now, right-click on and the on .
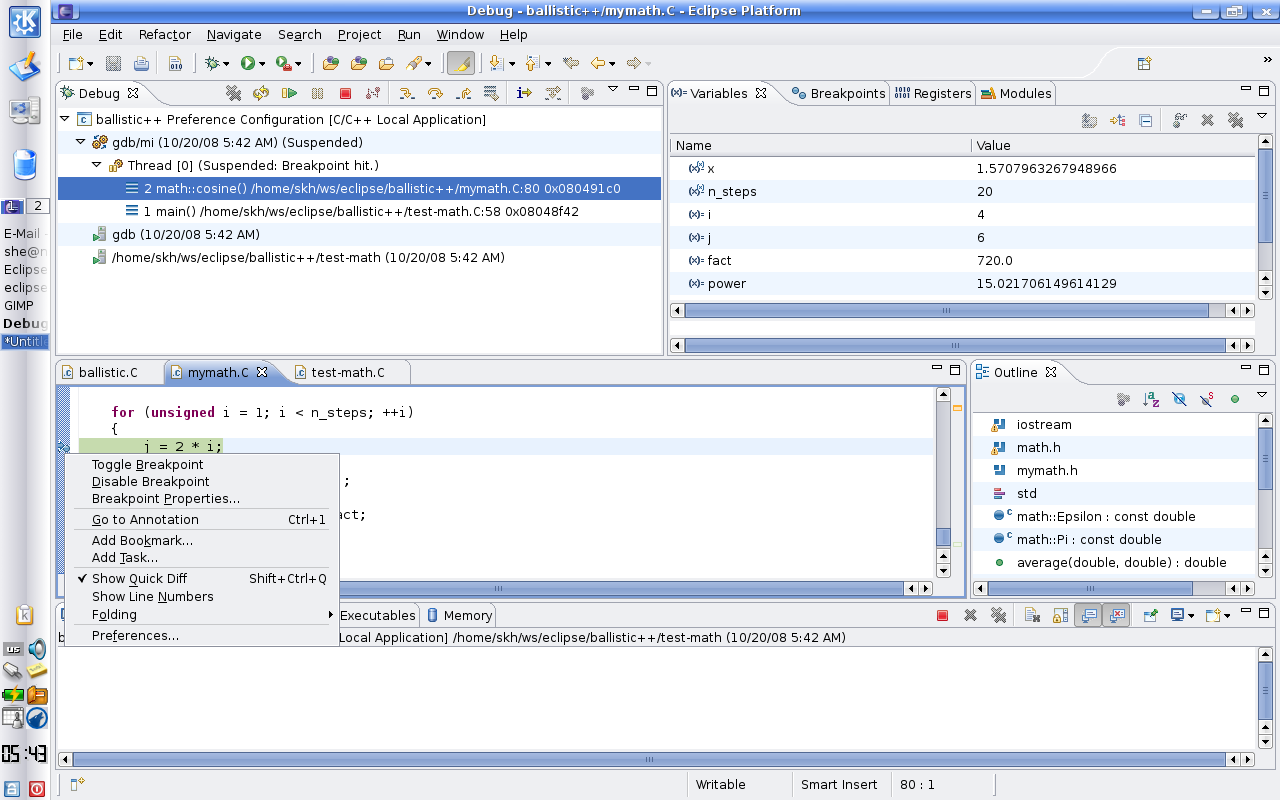
Debug Your Project
Eclipse provides an excellent environment for debugging. It uses the magnificant GDB but the power is due to the fact that it provides the developer with visual control over the code and the evolution of variables.
If the you're able to run your project, you could start debugging as easily as clicking on the button.